How to Install a Wood Fence: Posts, Panels, and Pro Tips for a Professional Finish
If you want to learn how to install a wood fence in Tampa, start with posts, then rails, then panels or pickets, and finish with the gate and hardware. This guide walks you through each stage so your fence stands straight, sheds water, and meets local rules. You will also see when a DIY job makes sense and when hiring Local Choice Fence saves time and headaches. Here is why: Tampa has specific height rules, Florida requires you to contact Sunshine 811 before digging, and Gulf humidity punishes unsealed wood.
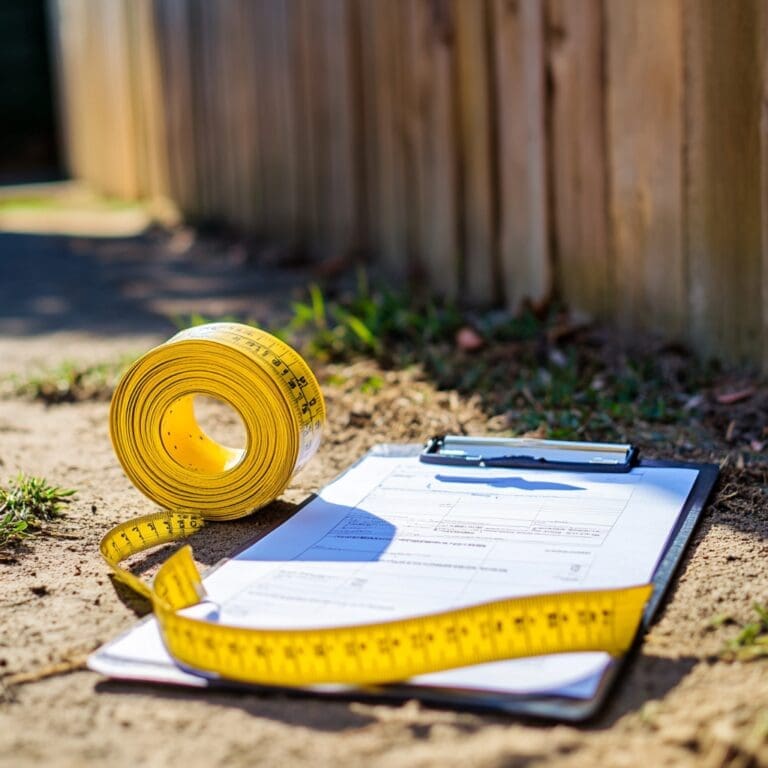
1) Plan and permits: Tampa-ready prep before you dig
Goal: confirm property lines, check local rules, and file your Sunshine 811 locate request.
Check your boundary. Review your survey or order one if you are unsure. Place stakes at corners and along straight runs. Share your plan with neighbors and your HOA if it applies.
Contact Sunshine 811. File a ticket at least two full business days before digging. Weekends and holidays do not count. The service is free, and Florida law requires it. Sunshine 811 notifies its member utilities to mark underground lines so you avoid damage and danger.
Know Tampa and Hillsborough rules. Tampa’s fence and wall regulations set standards for materials, heights, and visibility at intersections. Hillsborough County’s Land Development Code sets a six-foot maximum for most residential side and rear yards and lower heights in front yards. Tampa adopted amendments in 2023 that address conditions such as lots that abut commercial uses. Always check the current code language for your parcel.
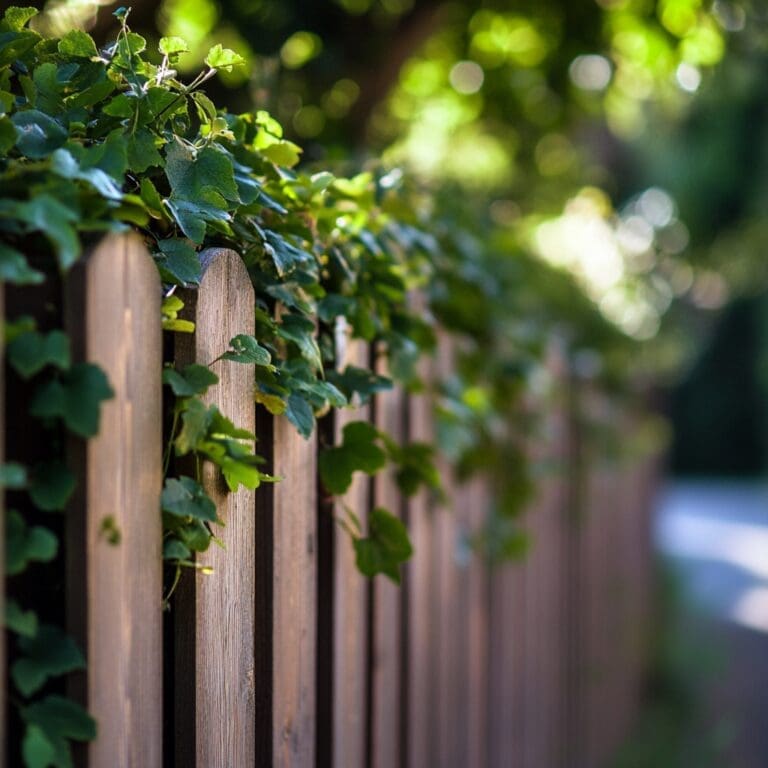
Pick materials that last in Tampa. Use pressure-treated pine or cedar with corrosion-resistant fasteners and connectors. Building codes and industry guidance call for hot-dip galvanized (ASTM A153) or stainless steel with treated wood. That choice resists the aggressive chemistry in modern preservatives and the salt-air environment around the bay.
Next steps: once utilities are marked and your plan is clear, set your layout lines.
2) Tools, materials, and a simple cut list
You will need:
- 4×4 posts for line runs, 6×6 or doubled 4×4 for gate posts
- Rails (typically two or three 2×4 rails per bay)
- Panels (6×8) or individual pickets
- Concrete mix or #57 gravel, plus a tamper
- Post-hole digger or auger, digging bar, spade
- String line, stakes, level, square, tape, saw
- Hot-dip galvanized or stainless screws and nails
- Optional fence rail brackets for faster panel work (ZMAX or stainless)
Cut list basics: measure your total linear footage, divide by bay length (6–8 feet), then add two rails per bay for a standard six-foot privacy fence.
Let’s break it down: buy 10–15 percent extra pickets for waste and defects. Store wood off the ground and covered, with airflow, until install day.
3) Layout: strings, corners, and spacing
Run strings first. Set stakes at corners and pull a tight mason’s line a few inches off the ground. Check for rocks, tree roots, and irrigation heads. Mark utilities as shown by your Sunshine 811 tickets and paint lines. Do not dig outside your described locate area without a new ticket.
Place critical posts. Set corner posts first. Then place end posts and gate posts. Measure and mark line posts at 6–8 feet on center to match your panels or rail spans. The Home Depot video series shows this sequence and stresses bracing and setting posts before rails.
Deal with slope early. Decide if you will step panels or rack pickets to follow grade. Stepping suits large changes. Racking suits gentle slopes.
Next steps: dig and set posts. Your layout now guides depth and alignment.
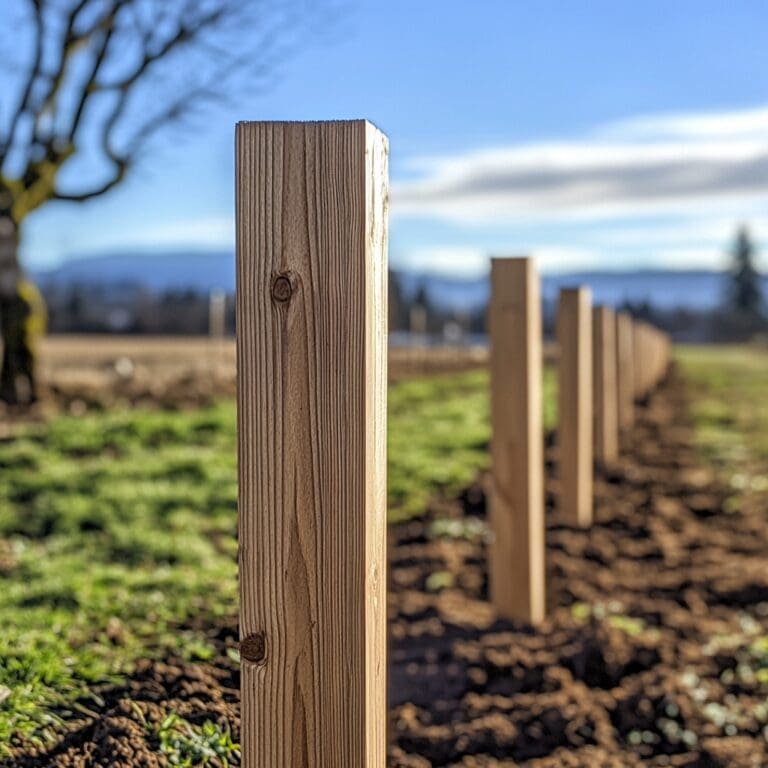
4) Set the posts: the make-or-break step
Depth rules. A common pro rule of thumb is to bury one-third to one-half of the post length. In Tampa, frost depth is not the driver, so focus on drainage and uplift resistance.
Hole shape and base. A bell-shaped or flared bottom helps resist uplift. Add gravel at the base for drainage, especially in high water table areas. Keep walls of the hole clean and undisturbed.
Concrete vs gravel. Concrete locks posts in place and helps with alignment over time. Many retailers and pro videos recommend concrete for privacy fence posts and gates. Some installers use compacted gravel for better drainage in certain soils, but concrete remains the most common choice for panel fences and gates in residential yards. Home Depot’s panel fence video and post video echo this approach.
Bracing and plumb. Brace each post in two directions. Check plumb on both faces. Align to the string, not the ground. Confirm gate openings with a story pole so hinges and latches land on solid structure.
Set time. Follow the bag’s instructions for initial set and cure. Avoid loading the posts with rails until the mix can take it. Keep water off the top of wet concrete and slope the top away from the post so rain sheds.
Next steps: after posts cure, install rails and panels or pickets.
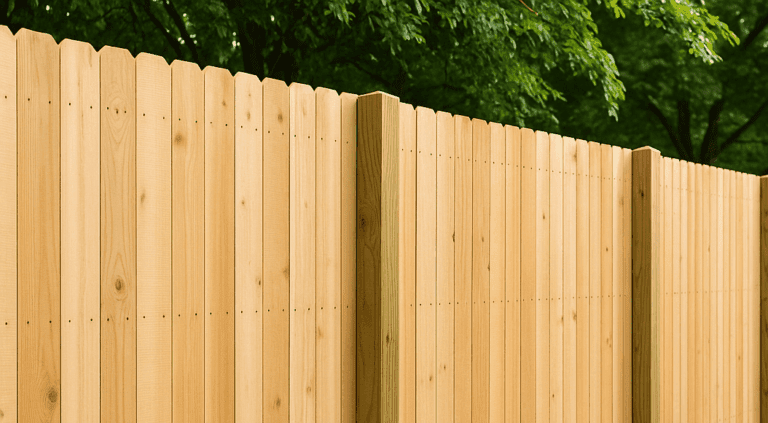
5) Attach rails and panels, or set pickets
Rails first. Install the bottom rail a few inches above grade. Maintain 1–2 inches of clearance between pickets and soil to limit wicking and rot. Check level and straight runs.
Brackets vs face-screwing. Rail brackets provide faster, repeatable connections and help DIY builders keep bays square. Choose ZMAX galvanized or stainless models for outdoor, treated wood use.
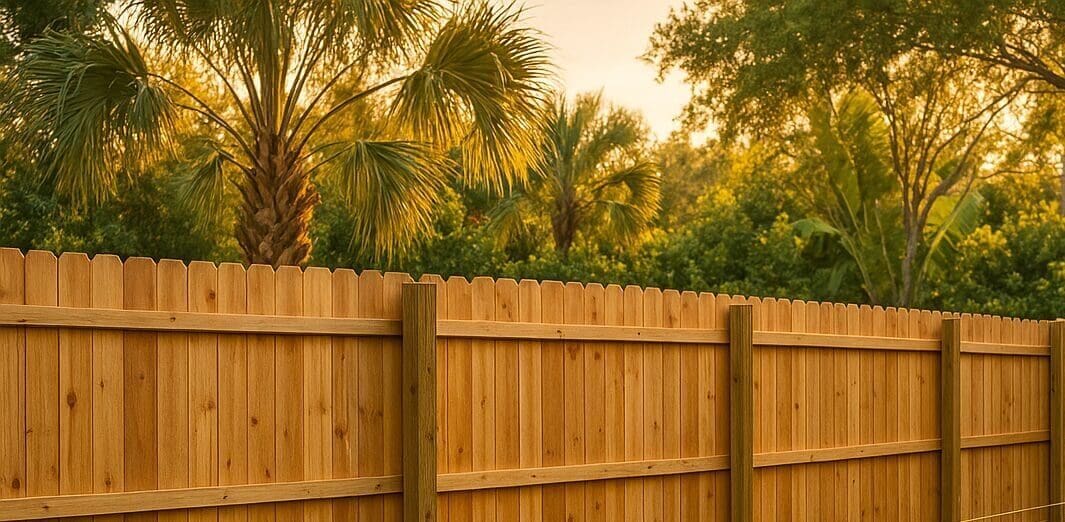
Panels or pickets. For 6×8 panels, attach to posts with brackets or by fastening rails on center directly to posts, as shown in Home Depot’s panel fence video. For site-built fences, set pickets with a spacer for consistent gaps and straight top lines.
Fasteners that last in Tampa. Use hot-dip galvanized fasteners that meet ASTM A153 or stainless steel. The American Wood Council’s deck guide and the American Galvanizers Association both call out these standards for treated wood environments. Salt air and moisture shorten the life of uncoated steel.
Deal with slope while you build. Step pre-made panels when grade changes quickly. Rack pickets across gentle slopes so gaps at the bottom stay tight.
Next steps: frame and hang the gate.
6) Hang the gate like a pro
Stronger posts. Use 6×6 or doubled 4×4 for gate posts and set them deeper than line posts. Add extra concrete and make sure both are dead plumb.
Brace the gate frame. Install a diagonal brace from the lower latch side up to the upper hinge side so the brace pushes into the hinge post. That direction carries the load. Pre-drill hinge screws and use long, corrosion-resistant hardware.
Set gaps correctly. Leave at least ½–¾ inch between the gate and the posts for swing and seasonal movement. Keep the bottom of the gate off the soil line.
Latch alignment. Install the latch square with a solid strike. Cycle the gate several times. Fine-tune by adjusting hinge tension and latch catch.
Next steps: add caps, seal the wood, and complete your checklist.
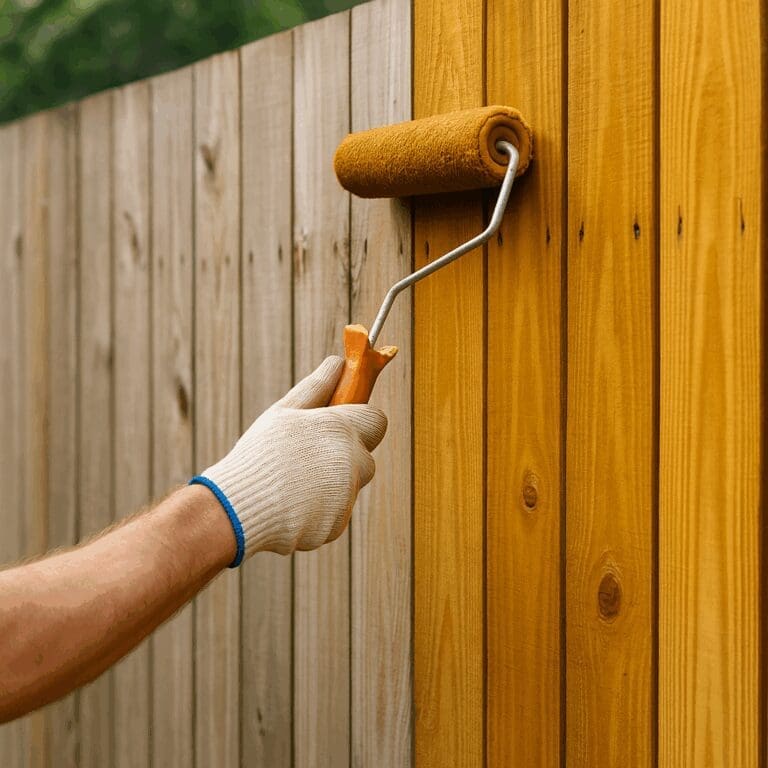
7) Finishing: caps, seal, and rot prevention in Tampa’s climate
Seal at the right time. Let new pressure-treated lumber dry to a paintable moisture level. Then apply an exterior wood stain or sealer with UV protection. Re-coat every two to three years in Tampa’s sun and humidity.
Keep wood off the soil. Maintain a small gap under pickets and rails. Reset sprinklers so they do not spray the fence. Add gravel at drip lines where needed.
Cap exposed end grain. Post caps shed water and slow checking. Seal cut ends as you go.
Hardware checks. Once a year, inspect brackets, screws, and nails for corrosion. Replace anything that shows red rust or loss of coating. Industry and code guidance favors hot-dip galvanized or stainless in treated wood.
Next steps: review the FAQs and decide if DIY is still the right call.
8) FAQs: time, cost, and common issues
How long will this take? A short run with straight grade often fits into a weekend, but you still need time for layout, 811 locating, and concrete cure. The Home Depot series shows the steps and pacing for layout, post setting, and panel hanging.
Do I need concrete for every post? Many homeowners set privacy fence and gate posts in concrete for stiffness and alignment. Some crews set line posts in compacted gravel in certain soils to promote drainage. Concrete is usually best for most residential panel fences.
How deep should I set posts? Plan for about one-third of the post length in the ground. Brace the post, set to the string, and check plumb on both faces.
Which fasteners should I buy? Choose hot-dip galvanized fasteners that meet ASTM A153 or stainless steel. This matches building code and manufacturer guidance for treated wood.
Why is my new fence leaning? Common causes include shallow posts, soft backfill, poor bracing during cure, and wind load on fresh concrete. Check plumb, add temporary braces, and re-set if needed. If clay or fill soil will not hold shape, consider a wider hole with a bell bottom and a deeper set.
Do I need a permit? Fence permit needs vary by location and project scope. Hillsborough lists work that may be exempt and provides contact details for Development Services. When in doubt, call and log the guidance.
9) DIY or hire Local Choice Fence in Tampa?
DIY fits small, straight runs with simple gates, easy soil, and good access. You have the tools and a helper for bracing and lifting. You have time to manage the 811 ticket and city or county questions.
Hire a pro when you face large gates, steep slopes, tree roots, rocky soil, tight easements, waterfront view rules, or schedule pressure. Our crews stage materials, file the Sunshine 811 ticket, confirm rules for your county, set gate posts correctly, and build your fence to last. You get a clean, fast result while we handle layout, utility marks, and the small fixes that keep a fence straight for years.
Next steps: if you want a fast, pro-grade install, reach out to Local Choice Fence for a free estimate today.
Step-by-step summary you can follow this weekend
- Confirm survey and any HOA rules.
- File your Sunshine 811 ticket and wait for markings.
- Review Tampa or Hillsborough fence rules for height and placement.
- Buy treated wood, rails, and galvanized or stainless hardware.
- Run strings, set corners, and mark post spacing.
- Dig bell-shaped holes to about one-third post length. Brace and set in concrete.
- Install rails with corrosion-resistant brackets or face-screw on center.
- Hang panels or set pickets with a spacer. Keep 1–2 inches off soil.
- Frame the gate with a diagonal brace toward the hinge side.
- Seal the fence when dry and re-coat on a regular schedule.
Why these steps win in Tampa
- Safety and law: Sunshine 811 prevents utility strikes and is required in Florida.
- Compliance: Tampa and Hillsborough set fence heights and visibility rules that affect design.
- Longevity: Hot-dip galvanized or stainless hardware resists corrosion with treated wood and sea air. Guidance cites ASTM A153 and code sections.
- Build quality: Retailer and trade guides agree on post bracing, concrete setting for panels and gates, and measured layout.
Final Note
If you want a perfect line, zero utility surprises, and a gate that does not sag, Local Choice Fence can install your wood fence in Tampa with pro-grade hardware and clean finishing. Get your free estimate, and we will handle the 811 ticket, verify code details, and deliver a fence that looks straight on day one and year five.